Steam Deck Secure Boot (Deck SB)

X-Post from https://github.com/downthecrop/DeckSecureBoot


Status: Beta 1.6

Arch-based live ISO for Enabling Secure Boot the Steam Deck (LCD and OLED)

Download

Features

  • Easy to use menu on the Deck (D-Pad navigation)
  • Enables Secure Boot without the UEFI exposing the toggle
  • Optional disk install to always have access to change SecureBoot status
  • Keeps SteamOS fully launchable while Secure Boot stays enabled
  • Supports every Steam Deck hardware revision (LCD and OLED)
  • Compatible with Clover Bootloader and Dual Boot setups (Windows/SteamOS)
  • Key safety baked in: you cannot lock yourself out of disabling Secure Boot
  • No tricks. This is valid Secure Boot, Windows anti-cheat software treats the deck as compliant
  • Fully reversible

This is heavily inspired by / a practical follow-up to:
👉 https://github.com/ryanrudolfoba/SecureBootForSteamDeck
His work showed the steps. This repo automates them into an ISO.

How to use it

  1. Get the ISO – Grab the latest release artifact or build it yourself with build.sh (see “Building it yourself”).
  2. Flash to USB – Use Balena Etcher (recommended) or any dd-like tool to write the image to a USB drive.
  3. Boot From USB – Plug in the USB, hold Vol- + Power, and pick the USB device from the boot selector.
  4. Run the menu – the ISO boots into a menu where you can enroll keys, sign loaders, rerun the EFI installer, or disable Secure Boot later.

How this works

The Deck never shows a “turn on Secure Boot” toggle inside its UEFI UI, but Valve ships it in setup mode. Setup mode means the firmware happily accepts new Platform Keys (PK), Key Exchange Keys (KEK), and db signatures without user prompts. When you pick the enrollment/enable option in the menu, we drop our baked keys (plus Microsoft’s) into the firmware variables. As soon as the PK lands, the firmware automatically flips Secure Boot to enabled. Later, if you use the unenroll/disable option, we clear those vars; once the PK is gone the Deck re-enters setup mode and Secure Boot is automatically disabled. No hidden switches involved—just key presence or absence.

Helpful information & FAQ

  • Clover note: Clover removes the Deck SB Jump loader entry from the Deck’s Boot Manager (Vol- + Power). Use Vol+ + Power, pick Boot From File, then load /efi/deck-sb/jump.efi to load it manually if you get stuck.
  • Signing other OSes: Any EFI loader or kernel you want to boot with Secure Boot enabled must be signed. Use the Signing Utility to add signatures for every distro you keep on the internal drive.
  • GRUB Secure Boot policy warnings: Some distros ship GRUB with grubshim (SteamOS GRUB has this too), which complains under Secure Boot. That’s why we rely on our custom jump loader instead.

Does this modify SteamOS? We drop a tiny systemd service whose only job is to ensure the Deck SB bootloader entry gets re-added if SteamOS updates wipe it. The OS rootfs, kernel, and userspace remain untouched. If you choose to install the ISO to disk from the menu, we also drop a copy of the live ISO environment on SteamOS (~400MB) so you can easily toggle SecureBoot in the future without the USB.

Will updates still work under Secure Boot? Yes. SteamOS keeps its original GRUB entry and kernel images in the EFI partition. We install an additional boot option without overwriting any existing bootloaders.

SteamOS stopped booting under Secure Boot! A recent SteamOS update probably bumped the kernel or initrd filenames. Re-run the EFI installer option from the menu; it re-parses the official SteamOS GRUB config and refreshes the arguments so the Deck SB loader tracks the new assets automatically.


Repo layout

  • build.sh – Entry point that prepares an Archiso workdir, copies our profile, injects payload + keys, and calls the resigner on output ISO.
  • profile/ – Trimmed Archiso baseline overrides (mainly profiledef.sh, EFI bits, pacman.conf).
  • payload/ – Everything that lands inside the live image. payload/root/menu.sh drives the ncurses UI, the deck-*.sh helpers enroll/unenroll/sign, and payload/etc/systemd/system/deck-startup.service re-adds the Deck SB boot entry if updates wipe it.
  • keys/ – the baked Secure Boot keys (PK.pem/PK.key). build.sh mirrors them to /usr/share/deck-sb/keys and /var/lib/sbctl/ during the image build.
  • resigner.sh – Post-build helper that re-signs the hidden ISO EFI image so the ISO still boots after the Deck trusts these keys.

What you get

  • A live ISO that understands the Deck’s UEFI
  • A ncurses menu with:
    1. Check Boot Status (UEFI? efivars? secureboot?)
    2. Enroll / Enable Secure Boot (runs sbctl enroll-keys -m with our baked keys)
    3. Signing Utility, EFI Dropper and ISO Installer (sign SteamOS or any other EFI loader in one place)
    4. Root shell
    5. Reboot / Poweroff
    6. Unenroll / Disable Secure Boot
  • Keys baked into the image, we all use the same keys so it's impossibel to lock yourself out of toggling SecureBoot (you can never lose the signing keys).
  • A fixed sbctl GUID so the layout is stable:
    • decdecde-dec0-4dec-adec-decdecdecdec

Why you need need to sign EFI's (or other OSes)

Secure Boot is simple but strict: the firmware will only run binaries signed by keys it trusts.

What this ISO does when you pick “Enroll / Enable Secure Boot”:

  1. Installs our key set (the ones below)
  2. Installs Microsoft production UEFI keys (so Windows and lots of vendor stuff still works)
  3. Tells firmware “we’re done, leave setup mode”

After that, when booting the UEFI checks the signature on EFI files:

  • anything signed by Microsoft → OK
  • anything signed by our keys → OK
  • anything not signed → blocked

SteamOS and other Linux installs often ship unsigned or signed with somebody else’s key, so the firmware doesn’t trust it. The Signing Utility entry takes the EFI binary you point at (SteamOS or anything else) and adds our signature so it passes Secure Boot with our key.

Important: if later you disable Secure Boot or clear vars, you do not have to “unsign” SteamOS or anything else. Signatures are just extra data. If Secure Boot is off, the firmware ignores them.


Keys we use (baked, public on purpose)

We all use the same keys so nobody bricks themselves permanently. These are the same ones we embed into the ISO:

Show baked keys

**PK.key**
```text
-----BEGIN PRIVATE KEY-----
MIIEvwIBADANBgkqhkiG9w0BAQEFAASCBKkwggSlAgEAAoIBAQDAiQ+44gfMGScB
XrKOF8smb+IbcvMzZaZJNYfngTr12ZfLcuGBXKA7JF5sssFMaRA7oQ/lYW4hT99q
acyRpSN3VFWbzZlrU3hq/SH+X1EEkoLfjmRaTjT5Zecuf7RGmf+VqCYvv6L73l/c
VwXnuX70kNkE82XmHGnX9wsmrMKH762lmS80NQS91Sl1jGKt3ylUZHHD7A68pSSR
JcLu2rFtqgaE9xt+V996QZvExD/nJQ/LvoVapB2z29dmdX4JidaK3hmUFseH2wYk
pbEuQB9JxhZZGHxwOiz50uctFiyUGXFJBkkS2yykuVtvDYYSzvPdpfFzqLw9+DGX
bWzrRwqJAgMBAAECggEADCB6e79dcFyIEEPh9u6iJ3pWAV+82E95u11LpfFhZS3w
9PMcueRyXOdFGGq/DToGAUt7UB5SLMBkJsa0CEj8DZnsrC5HtRdLQDwrY9DvriVU
1lsGWa3GgdUu3llT8/J1MNgVwMtPGNuSqdd7Eipb2kvrk/eJQxkBn/LVWR1DHSfQ
12xdq5jO/wxkeifPwwNSZ8QRIhorOV4jUZkBPJSYaaZDSNu3cDyeo7fVVXc5QVgm
ep5Iu8ntLiFcQkKkqsUuPGTre+Z1bjBhjFAqAK0+zJJ7xDF5Pfflwuj7W+AL0FZY
GxGTrZkIX/4Rg0Fe3H4pCAMZ311PlcemvMuH10BatQKBgQDfL/qqGLWh/gEW2Vb2
POMFe+YSttKuWNp8Kwj9h+ZFcSp+IW0T8vzklciUwJ8dqZNhqQ7KdNqpaJYZviHD
73oZoMuOqj1N0TGbsh/C2G76kgYlGhm8f1dBjZatHiMGrREpBO9m9+0A7o6TBP3T
RzMxmnMVLpML15KyYpBSrBPV5wKBgQDc13GRrnw0Kkwmi79LQUwJgB2jjW4re2gh
lsIqK88ok18ubdxRPe+gVak9DOq/hr4RuT6bE/nJIXKnJqLyGswjaV4GkfKN6u2C
gKnPjsl1jATHV5nq4gdpX/Z8C5EeEIDlmMxxOyl6ocVw95D2aXNsePf38fX5ftWg
z2LcmyIuDwKBgQC3sLJ7GrkrKXZWCu1C3tvuYIn8rxH5QtIXzgepOxev4bMaeoJf
H+c6b3jVzS9oZ3AQueadhM2PDrAzYcRCkjAJNckzkzO/f0R4I4N2h1HX0yVRlgjG
lnwHTPRNaXdkgD6WZyRut/ENiko4AKy0Hm6pDbhYH6wQ3A012l90W4I70wKBgQCC
mbJjCgIPw3fXT8uoEIyMDcT5ZPljI474VjSrRc8z2rtuNLAXJ36fnikAnrPw4hlj
V96rTUvp4yrvqMyySqCwzG47inIb9XPSOo6x3WpMZqqozKiMnHDvoz2cLCb81Zu0
rAEzcV5dVG/0F6QV5VTKMFvMuL3Td2uUtzBq8B9thwKBgQCwA6kAcdmfvtT87WM7
0xHkDUlPfJMt1ZiL9QdDPIR/AvDuQtiNBHUoaqDDJcwYwFe42URkBbitksXPTAtG
I6fHURi0C4xrR5XAFHdFz5pm3w3+1gTf8rj/NdPNOjlx+oheZaGGL6Gni8oF8S0L
gAleN/5iX9x9Htpi80o4N/kY3w==
-----END PRIVATE KEY-----
```

**PK.pem**
```text
-----BEGIN CERTIFICATE-----
MIIDETCCAfmgAwIBAgIUQBx1w+uTUKr7H2jtDG2rHfL4ZuowDQYJKoZIhvcNAQEL
BQAwGDEWMBQGA1UEAwwNU3RlYW0gRGVjayBQSzAeFw0yNTExMDcwMDE4MTJaFw0z
NTExMDUwMDE4MTJaMBgxFjAUBgNVBAMMDVN0ZWFtIERlY2sgUEswggEiMA0GCSqG
SIb3DQEBAQUAA4IBDwAwggEKAoIBAQDAiQ+44gfMGScBXrKOF8smb+IbcvMzZaZJ
NYfngTr12ZfLcuGBXKA7JF5sssFMaRA7oQ/lYW4hT99qacyRpSN3VFWbzZlrU3hq
/SH+X1EEkoLfjmRaTjT5Zecuf7RGmf+VqCYvv6L73l/cVwXnuX70kNkE82XmHGnX
9wsmrMKH762lmS80NQS91Sl1jGKt3ylUZHHD7A68pSSRJcLu2rFtqgaE9xt+V996
QZvExD/nJQ/LvoVapB2z29dmdX4JidaK3hmUFseH2wYkpbEuQB9JxhZZGHxwOiz5
0uctFiyUGXFJBkkS2yykuVtvDYYSzvPdpfFzqLw9+DGXbWzrRwqJAgMBAAGjUzBR
MB0GA1UdDgQWBBSb3Ivqxe6awsRvL4HUvn7I45RgrTAfBgNVHSMEGDAWgBSb3Ivq
xe6awsRvL4HUvn7I45RgrTAPBgNVHRMBAf8EBTADAQH/MA0GCSqGSIb3DQEBCwUA
A4IBAQARr6ABa4JHjW8/jbTjo7RZpobkaR523BhXvPc3U4j19jKvOLygRT68QYF3
XWAMVeMcFROs06tcSubxqdAKa4INMyVVklGslIT/z3CkLR5q9QV5SgI4Z3sRzAmL
PUKOoWc4x6op2heyxujlLwwiZouXWHqaklSaUymae9mCPUtwPg135WNc+E2BC4Ep
eU5IzhUe8nLj4wlWQoxdBsKWhuvsVJVEWs/HkzPrwulIAHQSb/divYe3eTrYKfib
gXnR8BtFo0R8QGTtodx6d7nu1QO3275yvHAZTr3bfygs5AkSHF9oqpaUPAOyPM4c
OyHXIWSLcl2GuAJnBoSR3rKgFvvr
-----END CERTIFICATE-----
```

These are embedded inside the ISO to KEK/db so we can also *clear* secure boot later.


The resigner (important)

Utility: resigner.sh patches the hidden EFI image inside the ISO:

  1. Find the El Torito UEFI image
  2. Extract it
  3. Sign EFI/BOOT/BOOTx64.EFI (and IA32 if present) with the baked keys
  4. Write it back at the same offset
  5. Outputs *-signed.iso

Usage:

./resigner.sh archlinux-steamdeck-sb-latest-x86_64.iso
# -> archlinux-steamdeck-sb-latest-x86_64-signed.iso

The main builder will auto-run resigner.sh on the generated ISO.

You can also point the resigner at other ISOs to make them bootable under these keys (Ubuntu etc.).

Heads-up: resigner.sh rewrites the hidden EFI boot image inside the ISO at its original byte offset. On rare ISOs that pack data immediately after that blob, the rewrite can corrupt the image. If it happens, try adding a little extra data to the ISO to shift around the structure and try again.


Building it yourself

  1. Boot an Arch x86_64 container
  2. sudo su
  3. Clone the repo and navigate to it
  4. ./build.sh will install all required dependencies and generate a new ISO. Finished ISOs are placed in ./out/ (or /out if that directory exists).

The builder writes ISOs to /out when that directory exists (handy inside containers) or ./out/.

Building from source (quickstart)

# optional: prep an output directory the container can write to
mkdir -p ./iso-out

# launch an Arch Linux build shell
docker run --rm -it \
  --platform=linux/amd64 \
  --privileged \
  -v $(pwd):/work \
  -v $(pwd)/iso-out:/out \
  archlinux:latest \
  /bin/bash

# Inside container
git clone https://github.com/downthecrop/DeckSecureBoot.git
cd DeckSecureBoot
./build.sh

Booting it on the Deck

  1. Power off Deck
  2. Hold Volume - and press Power
  3. Pick the USB you flashed the ISO to

If you choose to install the ISO to disk in the menu (optional) it will appear in the DeckSB Jumploader (jump.efi)

Credits

Correcting Perspective Projections in 3D Graphics: 2009Scape Ground Items

One of the most critical operations in computer graphics is the projection of a 3D world onto a 2D plane. This operation allows 3D objects to be displayed on conventional 2D screens, enabling us to play 3D video games or run simulations. This transformation is achieved through perspective projections. However, issues can arise when these transformations don't account for different screen sizes or aspect ratios, resulting in skewed and distorted images. In this article, we will delve into the process of correcting these perspective distortions.

Perspective Projections: A Primer

Perspective projection is a type of projection in which the 3D coordinates of an object are transformed into 2D coordinates. It creates an illusion of depth and distance. The further away an object is from the viewer, the smaller it appears on the screen.

However, the proportions of objects can sometimes be distorted due to different screen sizes and aspect ratios. The goal of our investigation was to correct this distortion.

A typical function for creating a perspective projection looks like this:

// Method to set the projection matrix used in OpenGL rendering
private static void setProjectionMatrix(
    float left,      // arg0
    float right,     // arg1
    float bottom,    // arg2
    float top,       // arg3
    float nearClip,  // arg4
    float farClip    // arg5
) {
    float nearClipDouble = nearClip * 2.0F;

    // Set the elements of the projection matrix
    matrix[0] = nearClipDouble / (right - left);
    matrix[1] = 0.0F;
    matrix[2] = 0.0F;
    matrix[3] = 0.0F;
    matrix[4] = 0.0F;
    matrix[5] = nearClipDouble / (top - bottom);
    matrix[6] = 0.0F;
    matrix[7] = 0.0F;
    matrix[8] = (right + left) / (right - left);
    matrix[9] = (top + bottom) / (top - bottom);
    matrix[10] = -(farClip + nearClip) / (farClip - nearClip);
    matrix[11] = -1.0F;
    matrix[12] = 0.0F;
    matrix[13] = 0.0F;
    matrix[14] = -(nearClipDouble * farClip) / (farClip - nearClip);
    matrix[15] = 0.0F;

    // Load the created matrix into OpenGL
    gl.glLoadMatrixf(matrix, 0);

}

Incorporating Field of View (FOV)

Field of view (FOV) plays a critical role in 3D projections. It represents the extent of the observable world at any given moment. FOV essentially determines how zoomed in or zoomed out the final image appears. Horizontal FOV (hFOV) and Vertical FOV (vFOV) represent the FOV in the horizontal and vertical directions, respectively.

To correct the perspective projection, we started by extracting the hFOV and vFOV from the projection matrix. The projection matrix, in computer graphics, is a matrix that transforms the coordinates in the view space to the clip space. We reverse-engineered this matrix and replaced hardcoded FOV values with the extracted hFOV and vFOV. Here is a simplified example of such a function:

The horizontal and vertical FOVs (field of view) are calculated based on the values of the left, right, bottom, and top clipping planes and the near clipping distance. They represent the extent of the observable world that can be seen from the perspective of the camera at any given moment. The calculations use the formula 2 atan((right - left) / (2 nearClip)) and 2 atan((top - bottom) / (2 nearClip)) respectively, which are derived from simple trigonometry.

// Method to set the projection matrix used in OpenGL rendering
private static void setProjectionMatrix(
    float left,      // arg0
    float right,     // arg1
    float bottom,    // arg2
    float top,       // arg3
    float nearClip,  // arg4
    float farClip    // arg5
) {
    float nearClipDouble = nearClip * 2.0F;

    ...

    // Calculate the horizontal and vertical field of view
    double hFOV = 2 * Math.atan((right - left) / nearClipDouble);
    double vFOV = 2 * Math.atan((top - bottom) / nearClipDouble);

    // Convert to degrees
    hFOV = Math.toDegrees(hFOV);
    vFOV = Math.toDegrees(vFOV);

    // Load the created matrix into OpenGL
    gl.glLoadMatrixf(matrix, 0);
}

Implementing the Solution

With the hFOV and vFOV now available, we could adjust the projection of our 3D world onto the 2D screen accordingly.

Our application involves a function that transforms 3D world coordinates (entityX, entityY, entityZ) into 2D screen coordinates. The challenge was to adjust the entity's screen position (spriteDrawX, spriteDrawY) based on the hFOV and vFOV. Here's how the function looked like:

/**
 * Calculates the 2D screen position for a position in the SceneGraph.
 *
 * @param entityX The x-coordinate of the entity in the scene graph.
 * @param entityZ The z-coordinate of the entity in the scene graph.
 * @param yOffset The vertical displacement for positioning the entity.
 * @return An array containing the calculated screen coordinates [x, y] or [-1, -1] if entity is not visible.
 */
public static int[] CalculateSceneGraphScreenPosition(int entityX, int entityZ, int yOffset) {
    final int HALF_FIXED_WIDTH = 256;
    final int HALF_FIXED_HEIGHT = 167;

    int elevation = SceneGraph.getTileHeight(plane, entityX, entityZ) - yOffset;
    entityX -= SceneGraph.cameraX;
    elevation -= SceneGraph.cameraY;
    entityZ -= SceneGraph.cameraZ;

    int sinPitch = MathUtils.sin[Camera.cameraPitch];
    int cosPitch = MathUtils.cos[Camera.cameraPitch];
    int sinYaw = MathUtils.sin[Camera.cameraYaw];
    int cosYaw = MathUtils.cos[Camera.cameraYaw];

    int rotatedX = (entityZ * sinYaw + entityX * cosYaw) >> 16;
    entityZ = (entityZ * cosYaw - entityX * sinYaw) >> 16;
    entityX = rotatedX;

    int rotatedY = (elevation * cosPitch - entityZ * sinPitch) >> 16;
    entityZ = (elevation * sinPitch + entityZ * cosPitch) >> 16;
    elevation = rotatedY;

    int[] screenPos = new int[2]; // X,Y

    if (entityZ >= 50) {
        if(GetWindowMode() == WindowMode.FIXED) {
            screenPos[0] = HALF_FIXED_WIDTH + ((entityX << 9) / entityZ);
            screenPos[1] = HALF_FIXED_HEIGHT + ((elevation << 9) / entityZ);
        } else {
            Dimension canvas = GetWindowDimensions();
            double newViewDistH = (canvas.width / 2) / Math.tan(Math.toRadians(GlRenderer.hFOV) / 2);
            double newViewDistV = (canvas.height / 2) / Math.tan(Math.toRadians(GlRenderer.vFOV) / 2);
            screenPos[0] = canvas.width / 2 + (int)((entityX * newViewDistH) / entityZ);
            screenPos[1] = canvas.height / 2 + (int)((elevation * newViewDistV) / entityZ);
        }
    } else {
        screenPos[0] = -1;
        screenPos[1] = -1;
    }
    return screenPos;
}

We used the tangent function from trigonometry to calculate the new viewing distance based on hFOV and vFOV, and used it to calculate the new screen positions.

Practical Application: 2009Scape Plugin

This theory becomes practical in the realm of game development. For example, in a plugin developed for the game 2009Scape, this corrected perspective projection is used to draw text above items onscreen. This plugin is a quality of life add-on that helps players determine which item drops are valuable and which should be ignored. Accurate world-to-screen projections are crucial in ensuring the text appears at the correct on-screen location, regardless of the player's perspective or window size.

Wrapping Up

This journey into perspective projections and field of view showcases the importance of understanding fundamental computer graphics concepts. By correctly implementing these concepts, we can create a more enjoyable and realistic gaming experience, improve our computational efficiency, and broaden our understanding of 3D graphics in general. It's a testament to the power of computer graphics when well understood and well applied.

Stay tuned for more deep dives into the world of computer graphics and game development. Until next time!

Is ExitLag Worth it? (Exitlag Review) WTFast, NoPing, Haste Explained

Check out my video review explaining ExitLag here on YouTube

Hey gamers! Do you want to lower your ping in Fortnite, Valorant, Call of Duty Warzone, Apex Legends, or League of Legends? Well This is just the article for you. I personally use ExitLag to lower my ping in League of Legends from 82ms to 60ms.

When you look to connect to a website or service your computer makes a request to server. This is also true of games. When connecting to a match your computer establishes a connection with a server through its IP address. Normally having that connection take an inefficient route towards its final destination is not a problem. An additional 200ms of latency for packets coming from YouTube or Netflix can easily be solved by those applications managing a buffer of data. However real time applications like games must send many packets a second along this route and that latency can really make a difference. By utilizing built in scanning tools these programs work out a way to forward your gaming traffic along the internet in a predictable and optimized way. This results in lower ping or latency as well as lower jitter and packet loss.

I mainly use this program while I am at the lake as my home in the city doesn't have routing issues. Programs like ExitLag and WTFast work by providing optimized routing for your gaming traffic. This is achieved by essentially running a VPN connection to their own server infrastructure to forward your packets efficiently.

All of these programs offer a free trail as they will not be useful for everyone. People living in highly populated cities with close servers are going to see the least amount of benefit from using a gaming VPN service. Check out my video explaining this topic more in depth if you're looking for additional information!

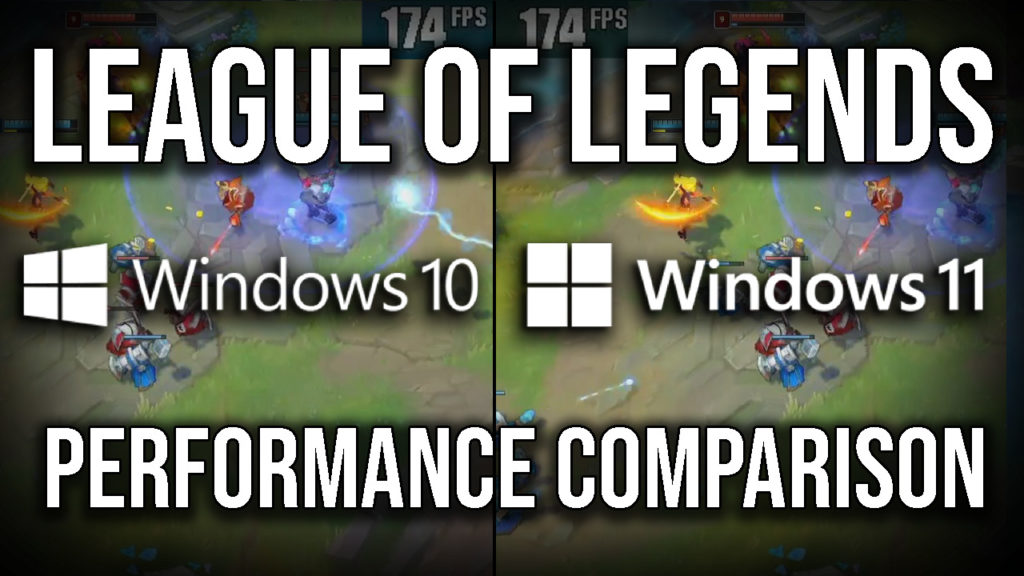
League of Legends Windows 10 vs Windows 11 Gaming Performance

League of Legends Windows 10 vs Windows 11 FPS Performance Test Benchmark. Watch the side by side here

Microsoft's latest Operating System Windows 11 is now available for early adopters and testers. If you are curious about the performance implications of this newest Windows update and how it applies to League of Legends this in depth Performance Comparison between Windows 10 1809 and Windows 11 21H2 has you covered!

Hardware

  • RTX 2080 8GB
  • i7 9700K @ 3.6Ghz
  • 16GB DDR4 RAM
  • NVMe SSD

Drivers/OS

  • NVIDIA 465.98
  • Windows 10 1809
  • Windows 11 21H2

League of Legends

  • Maxed Preset @ 1920x1080
  • 240 FPS Framerate Limit (Recommend)
  • VSync Disabled
  • Patch 11.15

Results

  • Windows 10 Average FPS: 168
  • Windows 11 Average FPS: 171
  • Advantage FPS: 3+ Average
  • Performance Gain Percent: ~2%

Recording Settings

Recorded with an external capture device and stats tracked with Riva Tuner

H.264 veryfast preset, 2500kbps Bitrate, 1920x1080

Dota 2 OpenGL vs Vulkan performance in Linux https://downthecrop.xyz/blog/dota-2-opengl-vs-vulkan-linux/