Tutorial: How To Run checkra1n on Linux via QEMU macOS Virtualization

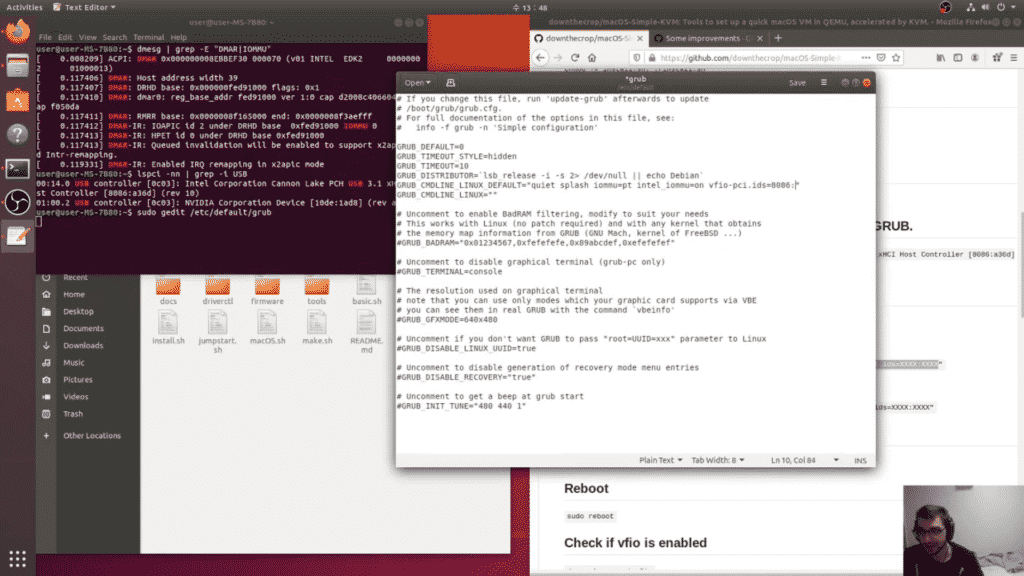
YouTube tutorial on how to enable IOMMU passthrough to QEMU virtual machine on Ubuntu 18.04 host.
checkra1n on Linux using IOMMU PCI USB pass through tutorial on YouTube

Edit February 5 2020 : There is now an official checkra1n release for Linux with no QEMU or Virtualization required! Watch my video here!

Introduction

Hey jailbreakers!

I've got a simple step by step guide on how you can dual boot Windows 10 and Ubuntu Linux 18.04 to run the checkra1n jailbreak tool! Be warned that setup is a little technical and will likely take around an hour. Lets start!

Hardware Compatibility Requirements

First off you're going to need to have a 64-bit processor that has virtualization enabled. You can check this in msinfo32.exe on Windows. Check "System Type" and scroll down to the Hyper-V entries. If System Type is "x64-based PC" the Hyper-V settings are "Yes" you have a CPU with the requirements.

Ubuntu 18.04 Install USB

Download the Ubuntu 18.04 ISO and use the rufus disk imaging tool to write it to any USB flash drive/thumb stick that's 2GB or greater.

Windows 10 Partitioning & Linux Installation Alongside Windows

You also need to partition some free space away from your Windows 10 Installation. Using the Disk Management diskmgmt.msc shrink your C: Volume by 25000MB and leave it as unpartitioned free space. Now boot from USB and run the installation utility in Ubuntu. Select "Install Ubuntu alongside Windows" If this open isn't there please don't continue with the guide as your may accidentally format your drive. Choose a username and password in the setup then click install. Wait for the installation to complete and then reboot into UEFI/BIOS to change the boot priority of your drive to default to Ubuntu. While you're in UEFI/BIOS you must also enable your CPU virtualization technology settings. Save and quit F10 and boot into your Ubuntu install.

Following GitHub Guide

From here you are ready to follow the instructions explained in the GitHub README.md so continue from there. Good luck!

checkra1n on PC/Linux via QEMU macOS Virtualization

Tutorial Guide checkra1n macOS on PC using QEMU and USB Passthrough: https://downthecrop.xyz/blog/tutorial-how-to-run-checkra1n-on-linux-via-qemu-macos-virtualization

EDIT: I have now successfully achieved checkra1n on Ubuntu Linux 18.04 using QEMU and IOMMU Pass through. Installation scripts coming soon!

I have a work around using a live Linux USB. There is no offical release for Windows and Linux currently so macOS must be virtualized using KVM and IOMMU groupings.

Watch my YouTube video explaining my virtualization approach

The checkm8 jailbreak implementation called checkra1n was released Sunday November 10th 2019 but only for macOS. This wasn't done to spite non-apple desktop users. The checkm8 exploit relies of precise control of the desktop USB stack to manipulate DFU mode.

Due to the precision of this communication they needed to craft the checkra1n desktop application to work with the the USB stack. The first USB stack they targeted as macOS, likely due to the developers familiarity with it. You can read more about the exploit in @qwertyoruiop talk at POC2019 which I attended.

So here's the work around. A disk image you can flash to any 16/32GB USB flash drive to boot into which will provide the macOS Virtual Machine and provide USB passthrough.

This is possible and I can get this working. Just give me another few days. You'll just need a 16/32GB USB drive and to boot into a live linux distro, run a script, and then you'll have a macOS Virtual Machine is USB passthrough for use with checkra1n. VirtualBox and VMWare WILL NOT WORK for checkra1n. You need to have lower level access.

About VM's and how this would work:

Stay tuned. I'll have an update soon. You can watch my YouTube video linked above.

DriveDroid – Install and Boot Windows, Linux, or BSD using Android Device as USB Drive

DriveDroid is an extremely useful Android utility application that allows rooted Android Phones to act as USB Mass Storage or a virtual CD-ROM drive. This can come in handy for booting PCs or emulating a USB drive of your own chosen size. The app only works on phones with root. I've personally tested DriveDroid on my rooted LG Nexsus 5X using Android 8.1 Oreo and Android 9.0 Pie and can confirm it is functional for installing BSD, Linux, and Windows.

Most phones emulate a USB stick when using DriveDroid. This is baked into the kernel of your phone. This means that only images that are compatible with USB sticks can be used. All IMG files will work, but not all ISO files will.

DriveDroid http://softwarebakery.com/projects/drivedroid

Installing/Booting Linux ISO from Android

Booting into live Linux environments or installers is clearly the main use for DriveDroid and it works exactly as you'd expect. You can use the included ISO download tool included in the application to get a verity of popular distributions. I was happy to see Void Linux made the list of easily downloadable ISO's as it's a personal favorite distribution of mine. The distributions I tried include: Ubuntu 19.04, Manjaro XFCE 18.1, and Debian 10 "Buster" Net Install. All Booted both UEFI and BIOS without issue simply selecting the ISO file in the app. I would suggest downloading your ISO's from your fastest mirror using your phones browser. This allows for faster speeds and the ability to resume the download if it's interrupted.

Installing Windows using Android as Installation Media/USB Drive

To install Windows from DriveDroid you need to create the installation media the same way you with a traditional USB drive. You can emulate a standard mass storage USB drive of any size using an image file with DriveDroid but you need to first create an image to be used. I wasn't able to use the blank image creation tool inside of the app but there is a simple work around.
Open any terminal emulator on your Android device and issue the dd command with a target of /dev/zero.

dd if=/dev/zero of=MyDrive.img bs=1m count=5120

Note: The of location is where the output file will be created. This example command will create a blank 5GB image in your working directory.

This will create a new empty image file that can be written to like any standard flash drive or thumb stick. If you don't have access to a PC to burn the ISO using the Windows Media Creation Tool or WoeUSB on Linux you can download my pre-created image for Windows 10 Build 1903 (May 2019 Update) here or from the Internet Archive here: https://archive.org/details/windowsx641903may2019img