Manually Update Samsung Galaxy S10 To Android 10

After unlocking the bootloader on my S10e I was unable to flash an unofficial Lineage OS 17.1 (Android 10) ROM to my device. I was originally on the stock AT&T ROM which STILL (January 2021) hasn't been updated to Android 10. Most other carriers have released Android 10 for their S10 devices but AT&T not only is shipping devices with fully locked bootloaders but also aren't supporting their customers with updates. With the power of modern technology and a little ingenuity we can right these wrongs.
First you'll need an unlocked bootloader so you can flash your device with Odin. I was able to purchase an unlock for my S10e from SamPWND (read my article here) but if you already have an unlocked bootloader you're ready to flash.

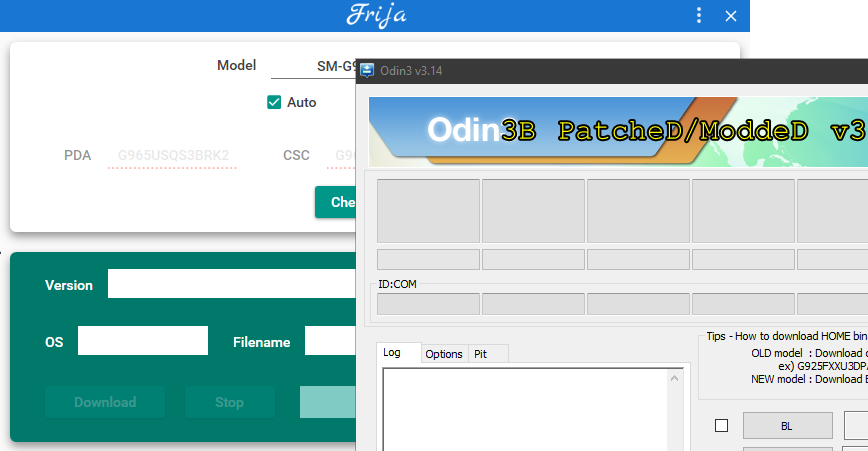
Two tools are required for this update process. Frija for downloading the updated stock Android 10 ROM and Odin3 to flash your device in download mode.

Frija Download: https://forum.xda-developers.com/t/tool-frija-samsung-firmware-downloader-checker.3910594/

Odin3 Download: https://forum.xda-developers.com/t/patched-odin-3-13-1.3762572/

Downloading Stock Android 10

An Android 10 Custom Rom requires your device to already be on Android 10 to flash it successfully. Since AT&T hasn't released a version of Android 10 I used Frija to download a clean ROM. I needed to use the SPR (Sprint) code in CSC which specifies the carrier. Check for updates, then download. Frija will decrypt the update so you can use it with Odin.
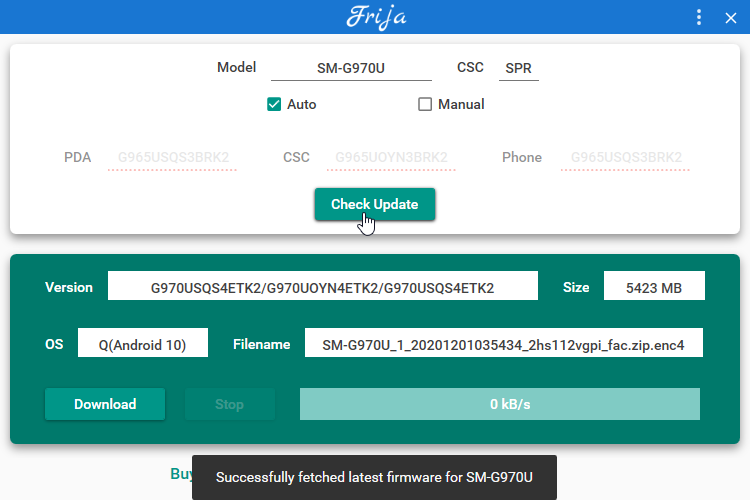
Frija Download Tool

Once you've downloaded the update unzip it somewhere. You will have a few files that match the input fields in the Odin3 tool. Put your device into Download Mode and set each of the fields to their matching file from the update. Even the BL field. This will NOT relock your bootloader. You can flash TWRP or a custom recovery after you have verified you can boot into Stock Android 10.

Flash and Wait. Then your device should reboot into Android 10!

How To: Reverse Engineer Any Private API (iOS/Android and Desktop)

Have you ever wanted to access data from an application that doesn't provide a Public API? Well I've got great news. That application is getting its data from somewhere. You just need to find out how to plug into it! This process is called Reverse Engineering (Or hacking if you want to pretend you're really smart) a Private API. I will document some tips and useful tools that will help you reverse any Private API from any application on any platform.

Reverse Engineer any Private API - Watch the YouTube video here! https://youtu.be/RchCi6E2hVs

Tools

There are a handful of tools that can be used to complete this task. Windows 10 was my platform of choice for working with the data so I'll be sharing what I used on here.

Fiddler: Fiddler is an HTTP/HTTPS Proxy that can be used to intercept and decrypt SSL/HTTPS traffic. This application is also useful for replaying requests, creating custom request, and exporting a request as cURL to be converted into Python 3. Fiddler is free to use, just sign in with your Google Account! Make sure you install the certificate and enable HTTPS mode so you don't miss any requests. https://www.telerik.com/fiddler

MitM Proxy: Man in the Middle Proxy is a great way to read data from Smart Phone Applications. This is what I used to get all the data I needed for my API reversal. Simply download the executable from https://mitmproxy.org/ to start up a server (disable your firewall or open port 8080) and then enter your PC's IP address into the Proxy Server settings of your Phones WiFi settings. After that navigate to http://mitm.it/ on your Phone and install the provided certificate. Follow the provided instructions on http://mitm.it/ and start sniffing!

Tips

Create a text document to save all your finding and especially any useful URL endpoints you find. Having your information organized will help to ensure that you don't waste time on the same thing twice or need to proxy your device over and over again to find what a request should look like.

For more information and an example of the API reversed you can watch my YouTube tutorial here.

Update to PHP 7.4 with Redis on Apache2 Ubuntu 16.04/18.04/20.04

PHP 7.4 is recommended to use used by WordPress. In this guide the simple to use commands will be layed out one by one for easy copy and pasting to your Ubuntu VPS/Server.

First update/sync your repositories and make sure you have redis-server and php7.4 installed

next disable php7.3/php7.2 and enable php7.4 (substitute for your currently used php version)

sudo a2dismod php7.3
sudo a2enmod php7.4

Install common php7.4 modules. You may skip this step if you know exactly what modules you need.

sudo apt install php7.4-dom php7.4-common php7.4-mysql php7.4-xml php7.4-xmlrpc php7.4-curl php7.4-gd php7.4-imagick php7.4-cli php7.4-dev php7.4-imap php7.4-mbstring php7.4-opcache php7.4-soap php7.4-zip php7.4-intl -y

Install php-redis and enable the module

sudo apt install php-redis
sudo phpenmod -v 7.4 -s ALL redis

restart the apache2 service

sudo service apache2 restart

Tutorial: How To Run checkra1n on Linux via QEMU macOS Virtualization

YouTube tutorial on how to enable IOMMU passthrough to QEMU virtual machine on Ubuntu 18.04 host.
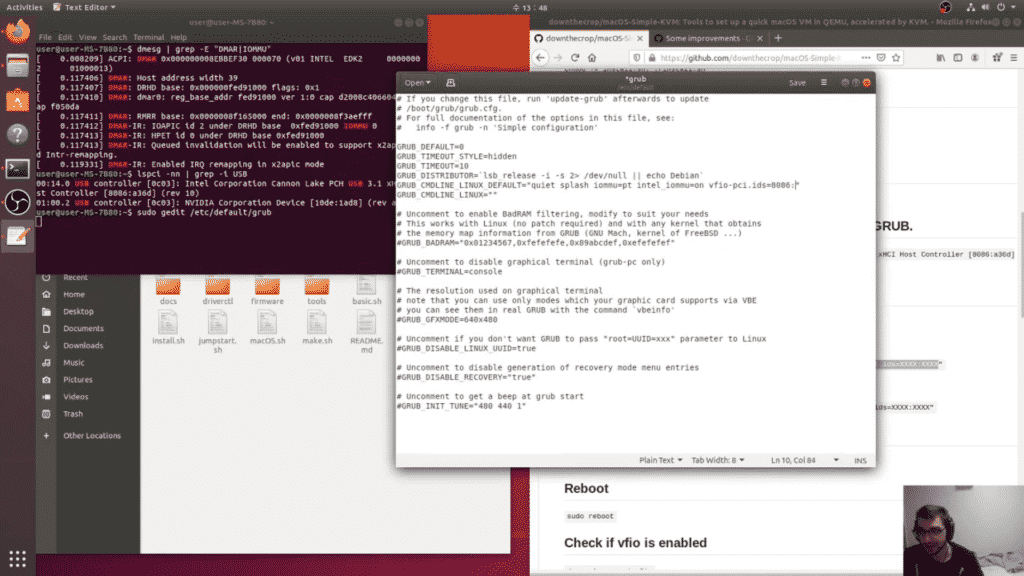
checkra1n on Linux using IOMMU PCI USB pass through tutorial on YouTube

Edit February 5 2020 : There is now an official checkra1n release for Linux with no QEMU or Virtualization required! Watch my video here!

Introduction

Hey jailbreakers!

I've got a simple step by step guide on how you can dual boot Windows 10 and Ubuntu Linux 18.04 to run the checkra1n jailbreak tool! Be warned that setup is a little technical and will likely take around an hour. Lets start!

Hardware Compatibility Requirements

First off you're going to need to have a 64-bit processor that has virtualization enabled. You can check this in msinfo32.exe on Windows. Check "System Type" and scroll down to the Hyper-V entries. If System Type is "x64-based PC" the Hyper-V settings are "Yes" you have a CPU with the requirements.

Ubuntu 18.04 Install USB

Download the Ubuntu 18.04 ISO and use the rufus disk imaging tool to write it to any USB flash drive/thumb stick that's 2GB or greater.

Windows 10 Partitioning & Linux Installation Alongside Windows

You also need to partition some free space away from your Windows 10 Installation. Using the Disk Management diskmgmt.msc shrink your C: Volume by 25000MB and leave it as unpartitioned free space. Now boot from USB and run the installation utility in Ubuntu. Select "Install Ubuntu alongside Windows" If this open isn't there please don't continue with the guide as your may accidentally format your drive. Choose a username and password in the setup then click install. Wait for the installation to complete and then reboot into UEFI/BIOS to change the boot priority of your drive to default to Ubuntu. While you're in UEFI/BIOS you must also enable your CPU virtualization technology settings. Save and quit F10 and boot into your Ubuntu install.

Following GitHub Guide

From here you are ready to follow the instructions explained in the GitHub README.md so continue from there. Good luck!

checkra1n on PC/Linux via QEMU macOS Virtualization

Tutorial Guide checkra1n macOS on PC using QEMU and USB Passthrough: https://downthecrop.xyz/blog/tutorial-how-to-run-checkra1n-on-linux-via-qemu-macos-virtualization

EDIT: I have now successfully achieved checkra1n on Ubuntu Linux 18.04 using QEMU and IOMMU Pass through. Installation scripts coming soon!

I have a work around using a live Linux USB. There is no offical release for Windows and Linux currently so macOS must be virtualized using KVM and IOMMU groupings.

Watch my YouTube video explaining my virtualization approach

The checkm8 jailbreak implementation called checkra1n was released Sunday November 10th 2019 but only for macOS. This wasn't done to spite non-apple desktop users. The checkm8 exploit relies of precise control of the desktop USB stack to manipulate DFU mode.

Due to the precision of this communication they needed to craft the checkra1n desktop application to work with the the USB stack. The first USB stack they targeted as macOS, likely due to the developers familiarity with it. You can read more about the exploit in @qwertyoruiop talk at POC2019 which I attended.

So here's the work around. A disk image you can flash to any 16/32GB USB flash drive to boot into which will provide the macOS Virtual Machine and provide USB passthrough.

This is possible and I can get this working. Just give me another few days. You'll just need a 16/32GB USB drive and to boot into a live linux distro, run a script, and then you'll have a macOS Virtual Machine is USB passthrough for use with checkra1n. VirtualBox and VMWare WILL NOT WORK for checkra1n. You need to have lower level access.

About VM's and how this would work:

Stay tuned. I'll have an update soon. You can watch my YouTube video linked above.